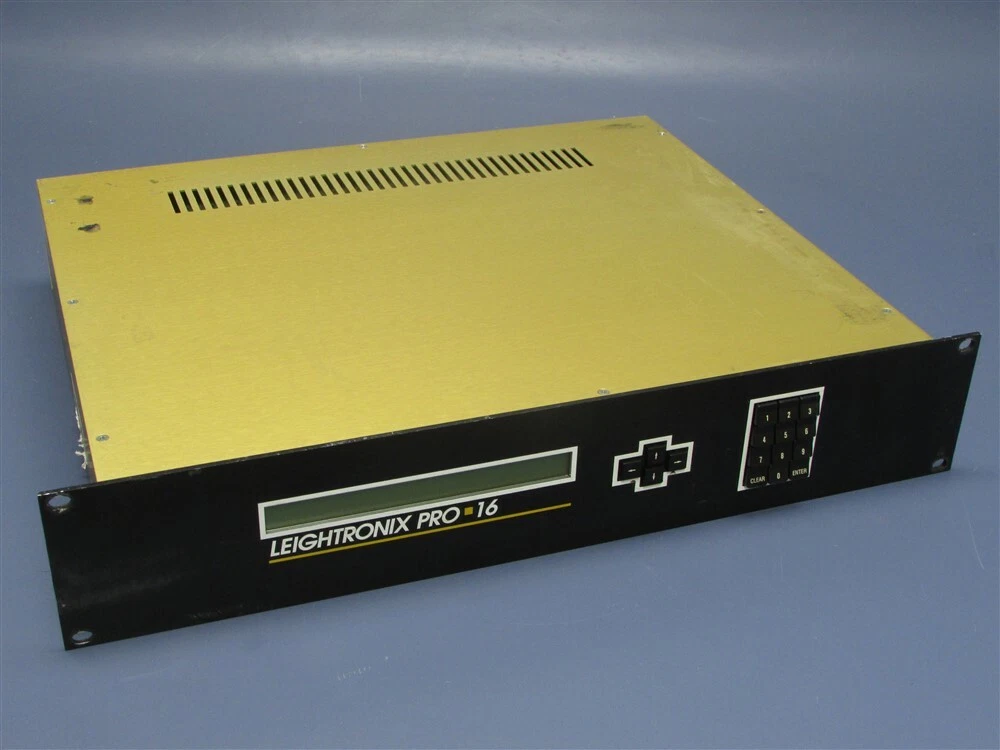
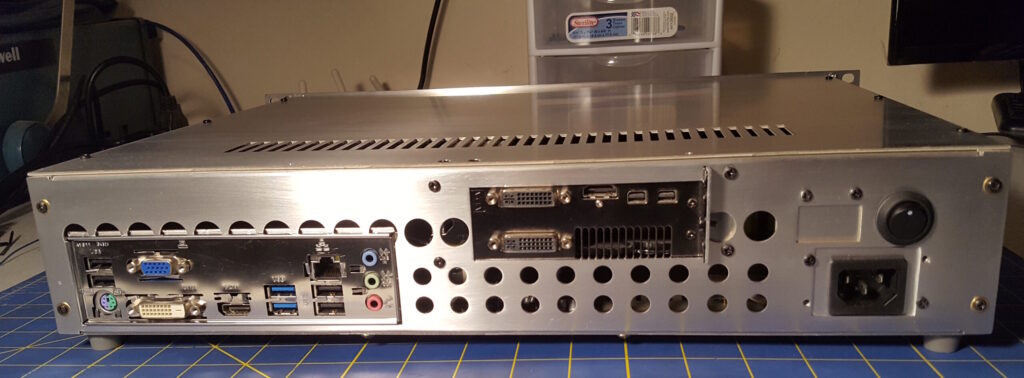
Here’s one from distant year of 2017. I had picked up an assortment of obsolete 1U and 2U networking and electronic equipment, most of which are currently destined for the scrap pile. One of those items was a Leightronix Pro 16 video Event Controller A/V switcher. It has 16 BNC and stereo RCA inputs and 4 outputs of the same kind. It also has a PRO-BUS connector and RS-232 input, as well as a parallel printer output. From what I gather you could program in “events” to run at specific dates/times, where an event would be say routing one of the inputs to one of the outputs.

Having no use for such a device it seemed like just the right size to stuff a bunch of mid-range 2015 PC components because why not! The front display and keypad also seemed to have potential to be used for something interesting and soon I was thinking up ideas for those. (Spoiler: The keypad and number pad were in fact, not used for anything)

But the display was! The display itself is a Sharp LM40X21B 2×40 character LCD panel, driven by several Hitachi HD44780U LCD drivers. Datasheets are readily available and the display can easily be interfaced with via ICSP and an Arduino. This was my first time playing with an Arduino, and my first genuine microcontroller based project so it took some time and patience to figure everything out. There was something very satisfying seeing actual characters light up on that vivid display which ignited a spark, and I wanted to do something cool with it.
My goal I decided, was for the display to show info about the PC such as CPU and GPU temps, hard disk activity, network usage, RAM usage, etc. in real time of course. I won’t go into great detail, but what I ended up with was using an Arduino Pro-Micro interfaced to the PC over a USB-Serial converter and a modifying Open Hardware Monitor to send data from the program to the Arduino.
For any of those not in the know, there was a great open-source hardware monitor aptly named Open Hardware Monitor which was actively developed up until 2020 and used for this project. It has been forked to Libre Hardware Monitor which is an excellent open-source hardware monitoring tool and most importantly still in active development.
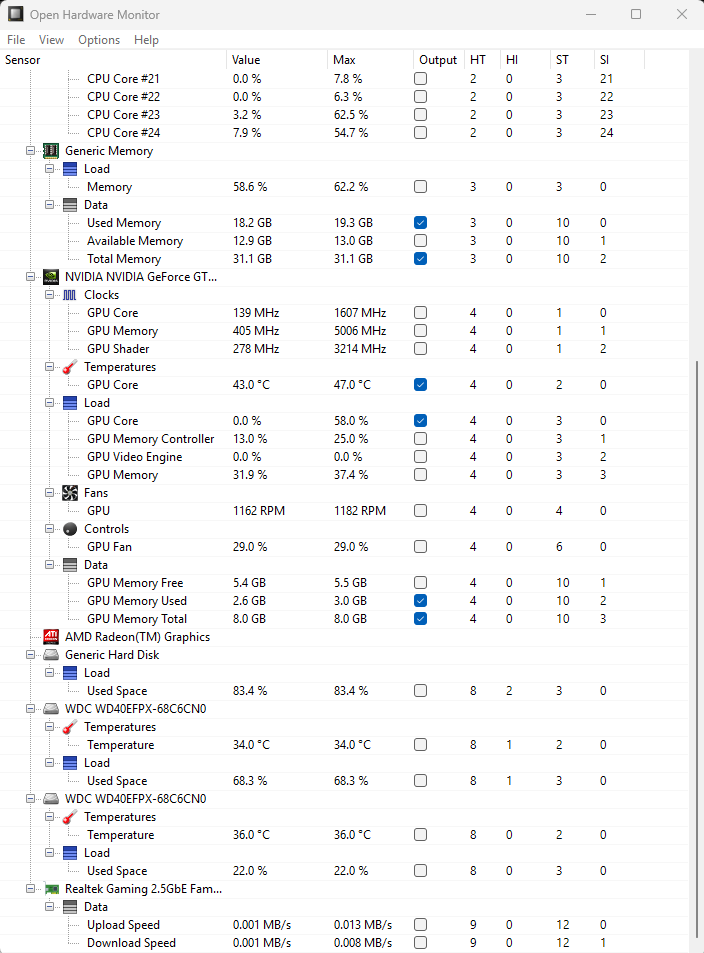
I (painstakingly from lack of experience) modified the OHM program itself be able to output data serially, and included a checkbox next to each sensor to select which sensor data to send. The HT, HI, ST, SI columns are Hardware Type, Hardware Index, Sensor Type, Sensor Index which are shown to uniquely identify hardware types and sensor types for the Arduino. I also added a class for network adapters, which utilized Windows 10’s built-in performance metrics to get the upload and download speeds.
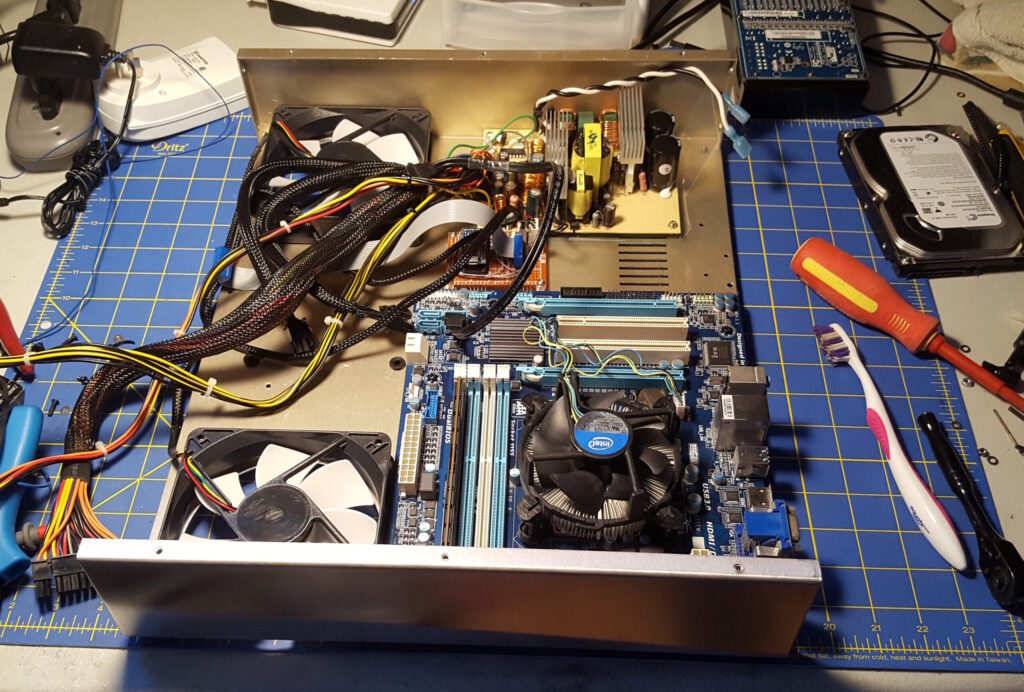
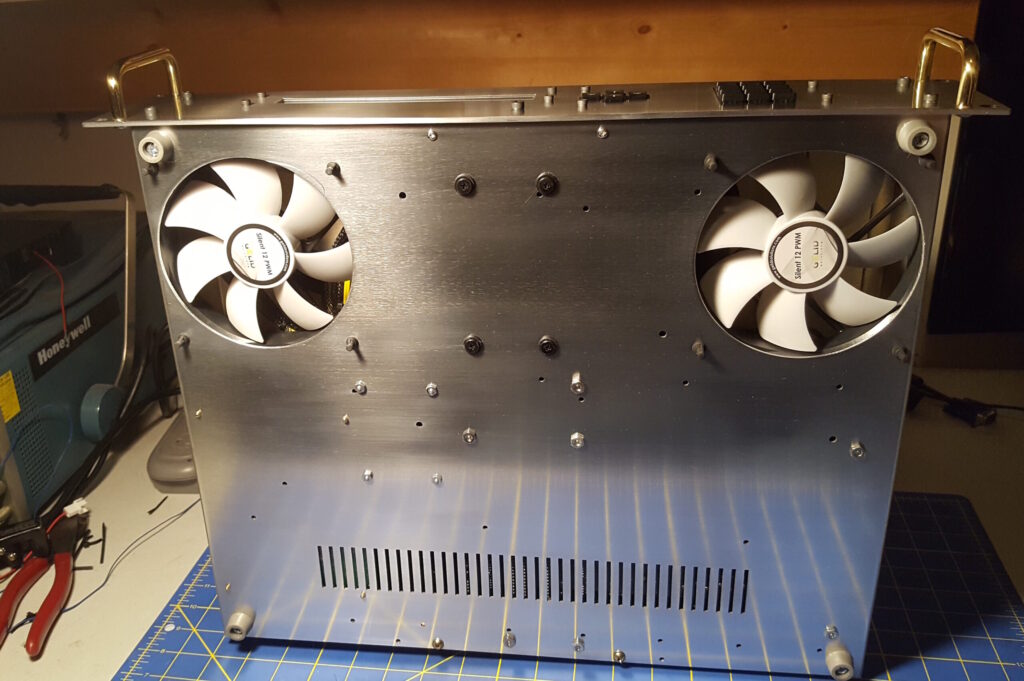
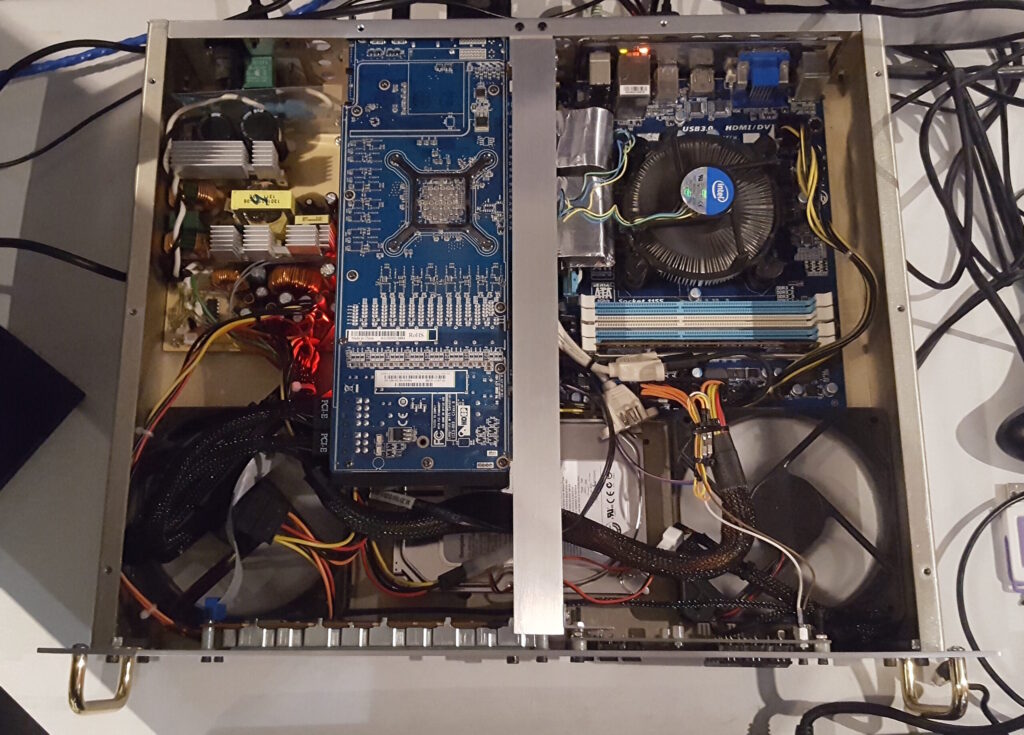
The specs on the PC were nothing special even for the great year of 2017 – an Intel i7 3770 paired with an mATX Gigabyte GA-B75M-D3H motherboard, 8GB RAM, and a GTX 760. Just barely adequate for games of the time. Below is a mock-up of the components. 2U is enough room to have the GPU to sit parallel to the motherboard with some kind of PCI-E extension cable and still have a free slot below it. The front panel has no ventilation nor did I want to add any, so the bulk of cooling is provided by 2 120mm fans pulling air in from below and pushing out the back, as well as some vents in the top and bottom.
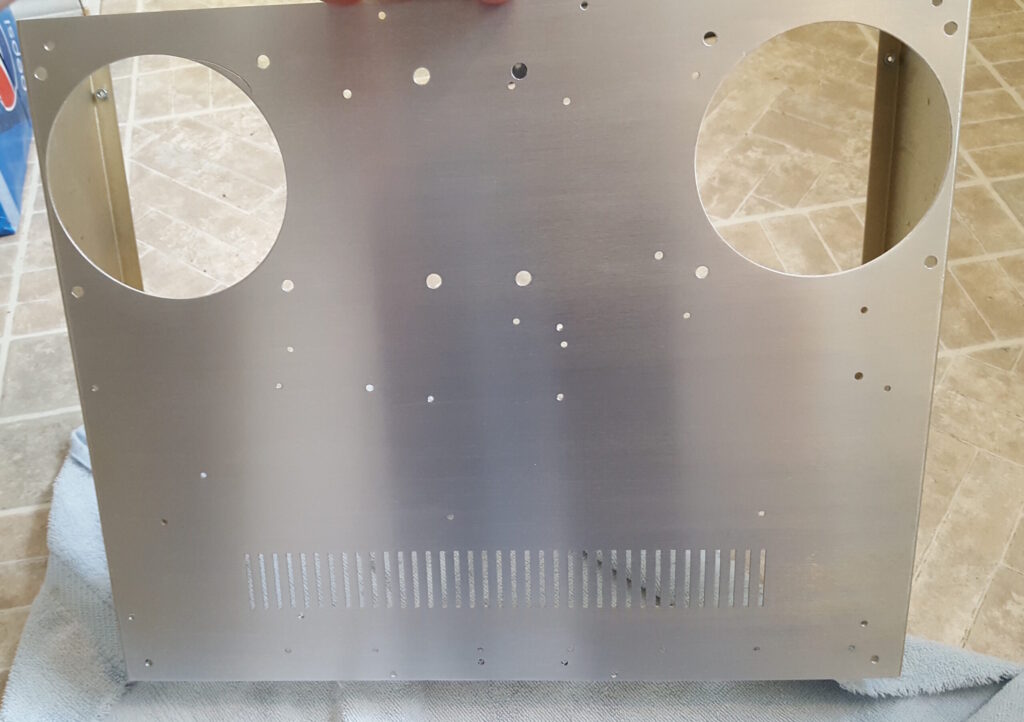
The case itself is all aluminum but anodized in an pale gold color which had to go. I ended up spending some hours wet sanding all the outside to bare aluminum which actually turned out pretty good.
I should haven taken more photos of the progress, and it seems as though I’m missing any evidence of a modification I made where I added a slot-in blower fan under the GPU as it was getting cooked under load. Nonetheless, here are some photos of the finished mod:
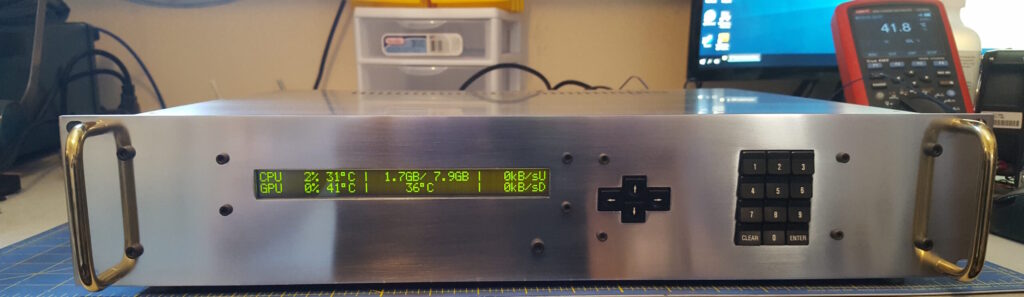
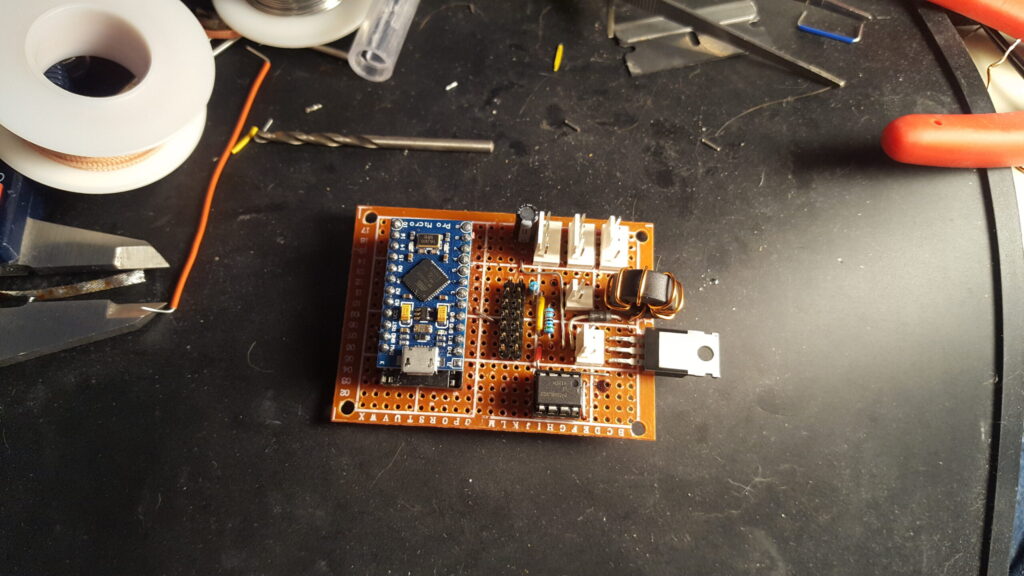
The display itself could be customized manually, by editing the Arduino code, to show any of the sensors from Open Hardware Monitor in a variety of units. It seems here I opted for CPU and GPU temperature and percent load, RAM usage, network interface upload and download speed and the one lone temperature in the middle is from an NTC probe fastened to one of the PSU heatsinks. That particular temperature probe controls a custom fan controller also driven by the Arduino. Depending on the temperature value, a varying duty PWM signal from the Arduino drives a MOSFET whose output is filtered with an inductor and capacitors to produce a DC voltage which varied from 0 to 12V. I recall killing 3 or 4 Arduino’s because the inductor was kicking back under certain conditions, before I added a flyback diode.
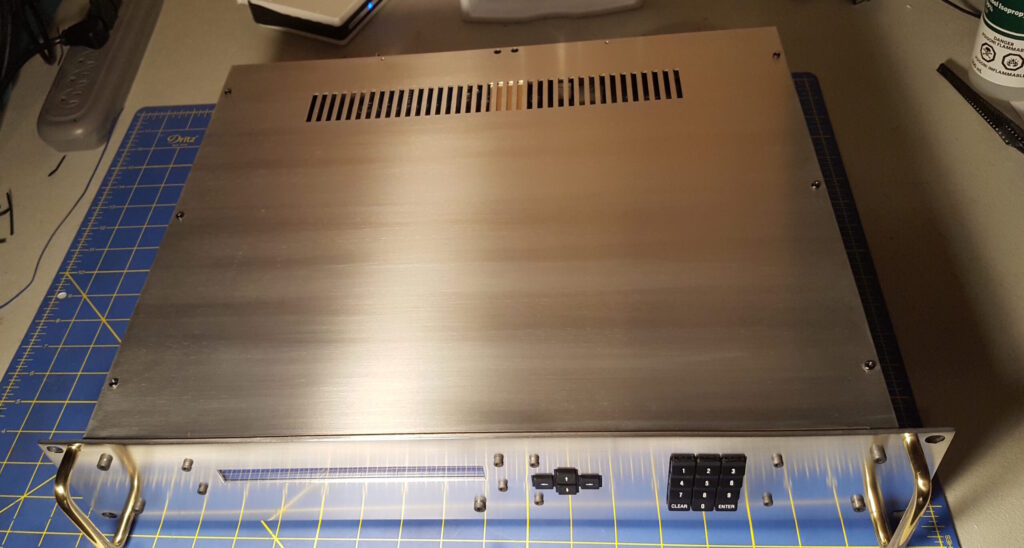
There’s an aluminum L-channel crossbar which supports the upper panel so you rest a fairly chunky monitor on top like a real desktop PC. At the time I had a 27″ Dell U2711 which weighed a whopping 23lbs, substantial for an LCD, but the case took it like a champ.

It was a fun project and I learned a ton, and grew fond of Arduino not only for it’s friendly hardware and interface but also because the great support I received over at the Arduino forums when working on this and other projects.